Pets Guide
7 Precautions to Follow With Your Beehive When You Have a Pet Dog
7 Precautions to Follow With Your Beehive When You Have a Pet Dog
Beekeeping can be a fulfilling and fascinating pastime, but it has its own difficulties, particularly if you have a dog as a pet. Dogs are inherently curious creatures that could endanger your beehive and the bees inside.
It’s crucial to take preventative measures as a conscientious beekeeper and dog owner to guarantee the security of your bees and your dog. This post will go over seven safety measures you should take if you have a dog as a pet and a beehive.
These safety measures will enable you to establish a safe environment for your dog and your bees, allowing you to use the advantages of beekeeping without endangering your dog or your bees.
7 Precautions to Follow With Your Beehive When You Have a Pet Dog
Keep The Beehive Out Of Reach
When it comes to beekeeping, the well-being of both your bees and your companion dog comes first. Keeping the beehive out of your dog’s reach is the first and most important step in ensuring they are safe. This can be accomplished by putting the hive somewhere your dog can’t reach, like on a stand or behind a fence.
By doing this, you can stop your dog from inadvertently tipping the hive over or upsetting the bees, which could endanger both your dog and the bees. It’s crucial to remember that prevention is essential for ensuring both your pets and your bees are safe.
Train Your Dog
One essential safety measure in beekeeping is teaching your dog to avoid the beehive. You may use positive reinforcement to train your dog that the beehive is off-limits.
As your dog stays away from the hive, you may give them treats or praise, and over time, you can progressively increase the distance between them. Your dog will eventually learn to associate the hive with good behavior if you are consistent and patient with them, which will make them avoid it.
This will protect your dog and ensure your bees’ safety by preventing any interruptions to the beehive.
Use A Barrier
Another efficient strategy to keep your dog away from the beehive is to put up a physical barrier. For example, to stop your dog from unintentionally tipping the hive over or upsetting the bees, you can install a fence or screen around it.
The fence should be robust enough to withstand any attempts by your dog to push it down and high enough to prevent your dog from jumping over it.
A physical barrier serves as both a safety measure for your dog and a visible cue for him to remain away from the hive. Larger dogs may not react to training as well as smaller dogs, so this precaution is especially helpful.
Keep The Area Clean
When it comes to beekeeping, it’s crucial to keep the space around the beehive clean and clear of food and other attractants. Bees are drawn to sweet smells by nature, which might be found in food or trash.
There is a higher chance that your dog may get stung if there are any food or waste sources close to the beehive. Keep the space tidy and clear of anything sweet-smelling to avoid this.
Bees may be kept away from the hive, and the risk of your dog getting stung can be reduced by regularly cleaning up any food scraps or waste in the area and storing food in sealed containers.
You can also keep your beehive organized by having the honey from the beehive extracted. You can also look for honey extractors to know more.
Be Aware Of Your Dog’s Behavior
To ensure your dog’s safety near the beehive, keep a close check on them. It’s crucial to take action to stop your dog from going too close to the hive if you see them exhibiting interest in it.
This can be done by yelling at your dog to leave the hive, putting up obstacles physically or verbally, or entertaining your dog with a toy or treat. It’s critical to pay attention to your dog’s behavior and take action before they disturb the bees or end up getting stung.
You may avoid any mishaps or injuries by being proactive and monitoring your dog’s behavior near the beehive.
Provide A Water Source
Bees must have access to water to survive because they use it to control the hive’s humidity and temperature. To avoid your dog disturbing the bees or getting stung, it’s crucial to keep the water away from them.
You can accomplish this by positioning a bee water source far from areas your dog can access. Although keeping it out of your dog’s reach, a bird bath or shallow dish with rocks or floatable objects can offer a safe and accessible water source for the bees.
You may assure the bees’ survival and avoid any mishaps or harm to your dog by providing a separate water source for them.
Use Protective Clothing
Proper attire is needed to avoid bee stings and ensure safety when working with your beehive. To prevent bee stings, beekeepers dress in protective gear such as a bee suit or jacket, gloves, and a veil.
Also, this stops the release of pheromones, which may draw in other bees and raise the risk of being stung. Moreover, wearing protective clothing can help prevent unintentional stings if your dog approaches the hive too closely.
You can work with your beehive confidently and safely and reduce the possibility of injuries to both you and your dog by using protective clothes.
Conclusion
To safeguard the safety of both your dog and your bees, having a pet dog and a beehive takes careful planning and procedures.
However, you may establish a secure environment for your dog and your bees by taking the seven steps listed above.
Recall to keep the beehive out of your dog’s reach, teach your dog to avoid the hive, use physical barriers, maintain the area clean, pay attention to your dog’s behavior, give a water source, and wear protective clothing.
By following these precautions, you can benefit from beekeeping while protecting your dog as a pet and your bees.
Fact check…
We hope you enjoyed this article…?
Рleаse let us knоw yоur thоughts in the соmments seсtiоn. Feel free to share with us in the comments section below.

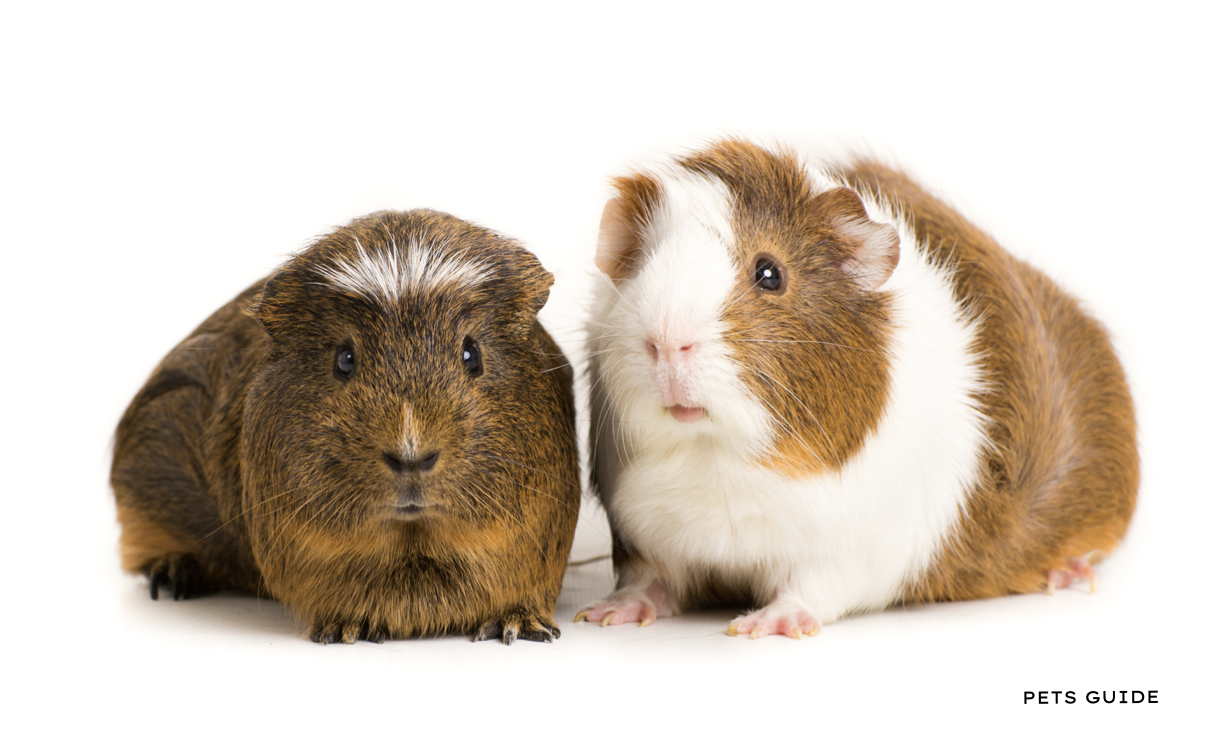
Guinea Pig Teeth: All You Need to Know About Guinea Pig Dental Care
Guinea pigs are adorable and gentle pets, but their dental health often goes overlooked. Just like humans, these furry friends require proper dental care to ensure they lead happy and healthy lives. In this comprehensive guide.
we’ll delve into everything you need to know about guinea pig dental care, from understanding their unique dental anatomy to providing essential dental maintenance tips.
Guinea pigs have unique dental needs that necessitate special care and attention from their owners.
Their teeth grow continuously throughout their lives, requiring proper maintenance to prevent overgrowth, misalignment, or other dental problems.
Unlike humans, guinea pigs’ teeth lack roots and are open-rooted, meaning they grow continuously to compensate for wear from chewing.
To maintain your guinea pig’s dental health, provide a balanced diet rich in hay, fresh vegetables, and high-quality pellets. These foods help wear down their teeth naturally and provide essential nutrients for dental health.
Additionally, regular veterinary check-ups are essential to monitor your guinea pig’s dental condition and address any emerging issues promptly.
By prioritizing proper dental care, you can ensure your guinea pig enjoys a happy, healthy life free from the discomfort and complications associated with dental problems. Remember, a little attention to dental care goes a long way in keeping your beloved pet smiling brightly for years to come. Let’s dive in!
Understanding Guinea Pig Dental Anatomy
Before delving into dental care practices, it’s crucial to understand the unique dental anatomy of guinea pigs. These small rodents have continuously growing teeth, known as hypsodont teeth.
Unlike humans, whose teeth stop growing after a certain point, guinea pigs’ teeth grow continuously throughout their lives. This characteristic makes dental care particularly important for them.
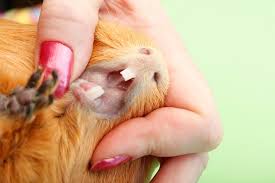
Guinea pigs have a total of 20 teeth, consisting of incisors, molars, and premolars.
Their incisors, the front teeth, are particularly prominent and essential for grasping and cutting food. Behind the incisors are the molars and premolars, which are responsible for grinding and chewing food into smaller, digestible pieces.

Signs of Dental Problems in Guinea Pigs
Detecting dental issues in guinea pigs can be challenging, as these animals are adept at hiding signs of discomfort.
However, there are several indicators that may suggest your guinea pig is experiencing dental problems:
-
Loss of Appetite: A sudden decrease in appetite could indicate dental pain or difficulty chewing.
- Weight Loss: If your guinea pig is losing weight despite having a consistent diet, it may be due to dental issues affecting their ability to eat.
- Excessive Drooling: Drooling or excessive salivation can be a sign of dental discomfort.
- Changes in Behavior: Watch out for changes in your guinea pig’s behavior, such as lethargy, reluctance to eat, or increased irritability, which could signal underlying dental issues.

Essential Dental Care Practices for Guinea Pigs
Maintaining good dental hygiene is crucial for preventing dental problems in guinea pigs.
Here are some essential dental care practices to incorporate into your pet care routine:
Provide Chew Toys:
Guinea pigs need to chew on hard objects to wear down their continuously growing teeth. Offer safe chew toys made of untreated wood or chewable materials to help keep their teeth trimmed and healthy.
Offer Hay:
High-quality hay should make up the majority of your guinea pig’s diet. The fibrous texture of hay encourages chewing, which aids in wearing down their teeth naturally.
Monitor Diet:
Ensure your guinea pig’s diet consists of a variety of fresh vegetables, pellets formulated for guinea pigs, and limited fruits. Avoid feeding them sugary or sticky treats, as these can contribute to dental problems.
Regular Veterinary Check-ups:
Schedule regular check-ups with an exotic animal veterinarian who has experience with guinea pigs.
They can perform dental examinations and address any issues before they escalate.
Conclusion
Proper dental care is essential for maintaining the health and well-being of your guinea pig.
By understanding their unique dental anatomy and implementing essential dental care practices you can help ensure your furry friend enjoys a happy and healthy life free from dental problems.
FAQs (Frequently Asked Questions)
How often should I trim my guinea pig’s teeth?
Guinea pigs’ teeth typically wear down naturally with proper diet and chewing habits. However, if your guinea pig has dental issues, your veterinarian may recommend periodic teeth trimming under sedation.
Can I use human toothpaste to brush my guinea pig’s teeth?
No, human toothpaste contains ingredients that are harmful to guinea pigs if ingested. Stick to using a soft-bristled toothbrush and plain water for cleaning their teeth.
Are there any supplements I can give my guinea pig to promote dental health?
While a balanced diet rich in hay and vegetables is usually sufficient for maintaining dental health, your veterinarian may recommend specific supplements if your guinea pig has dental deficiencies.
How can I tell if my guinea pig is in dental pain?
Guinea pigs are adept at hiding signs of pain, but some common indicators include decreased appetite, weight loss, drooling, and changes in behavior.
Can dental problems in guinea pigs be hereditary?
Yes, dental issues in guinea pigs can sometimes have a genetic component. If you’re considering adopting a guinea pig, inquire about its dental history if possible.
Are there any foods that can help prevent dental problems in guinea pigs?
Fibrous foods like hay and crunchy vegetables can help promote dental health by encouraging natural wear and tear on their teeth.
What should I do if I suspect my guinea pig has a dental problem?
If you notice any signs of dental issues in your guinea pig, such as changes in eating habits or behavior, consult with a veterinarian experienced in treating exotic animals as soon as possible. Early intervention is key to preventing dental problems from worsening.
References:
- American Veterinary Dental Society. (n.d.). Dental Anatomy of Guinea Pigs. https://www.avds-online.org/guinea-pigs/
- PDSA. (2022). Dental Care for Guinea Pigs. https://www.pdsa.org.uk/taking-care-of-your-pet/looking-after-your-pet/small-pets/dental-care-for-guinea-pigs
How to Care for a Baby Red-Eared Slider: A Guide to Raising Young Turtles
So, you’ve decided to take on the noble task of raising a baby Red-Eared Slider. Congratulations! These little reptiles can make fantastic pets, but like any youngster, they require proper care and attention to thrive. Whether you’re a seasoned turtle enthusiast or a newbie to the world of reptile parenting.
However, similar to any young creature, they demand dedicated care and vigilance to flourish. Whether you find yourself a seasoned aficionado of turtles or a complete novice in the realm of reptile parenting, this all-encompassing guide is here to lend a helping hand.
Through the following comprehensive discourse, we shall navigate through the intricacies of nurturing your baby Red-Eared Slider, ensuring their well-being and vitality.
From establishing the ideal habitat to understanding their dietary requirements, from maintaining optimal temperature conditions to fostering interaction and companionship, every aspect of your journey as a turtle parent will be meticulously addressed. So, let us embark on this journey together, paving the way for your baby Red-Eared Slider to grow and thrive in a environment where happiness and health are paramount.
Understanding Your Baby Red-Eared Slider
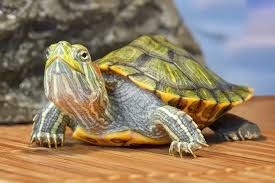
Before diving into the nitty-gritty of care, it’s essential to understand a bit about the species you’re bringing into your home. Red-Eared Sliders (Trachemys scripta elegans) are one of the most popular pet turtles globally, known for their striking red markings on each side of their heads. Native to the southern United States, these semi-aquatic turtles can live for several decades when properly cared for. As babies, they are tiny and delicate, but with the right care, they can grow into robust and captivating pets.
Creating the Ideal Habitat
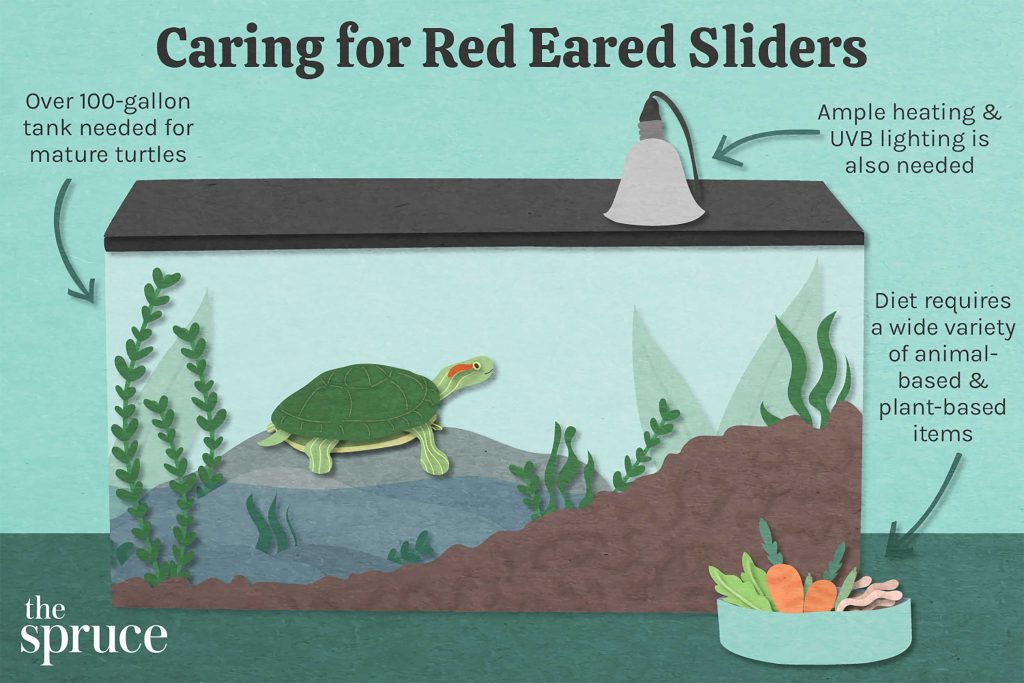
Setting up the perfect habitat is the first step in ensuring your baby Red-Eared Slider thrives. For young turtles, a spacious aquarium or tank is necessary, ideally a 20-gallon tank for a single turtle. Make sure to provide plenty of swimming space as well as a basking area where they can dry off and soak up some UVB rays.
A combination of a dry basking area and a warm, humid environment underwater mimics their natural habitat and encourages healthy growth.
Temperature and Lighting Requirements
Temperature regulation is crucial for the well-being of your baby Red-Eared Slider. Aim to maintain a water temperature between 75°F and 80°F (24°C and 27°C) and an air temperature around 85°F (29°C) in the basking area.
Use a combination of underwater heaters and basking lamps to achieve these temperatures, ensuring there are no drastic fluctuations throughout the day and night. Additionally, provide UVB lighting for at least 10-12 hours a day to support proper shell and bone development.
Achieving these ideal temperatures requires careful planning and the right equipment. Utilize a combination of underwater heaters to regulate the water temperature and basking lamps to provide warmth in the designated basking area.
By carefully calibrating these heating elements, you can create a stable and cozy environment for your baby Red-Eared Slider, minimizing the risk of stress or health complications due to temperature fluctuations.
Invest in high-quality UVB bulbs specifically designed for reptiles, positioning them within the habitat to mimic natural sunlight and promote vital physiological processes.
Feeding Your Baby Red-Eared Slider
Like all growing creatures, baby Red-Eared Sliders have hearty appetites and specific dietary needs. Offer a varied diet consisting mainly of commercial turtle pellets, supplemented with fresh vegetables such as leafy greens, carrots, and squash. Additionally, provide occasional treats like small fish, earthworms, or crickets to add variety and essential nutrients to their diet. Remember to remove any uneaten food promptly to maintain water quality.
Maintaining Water Quality
Clean water is vital for the health of your baby Red-Eared Slider. Invest in a high-quality water filtration system and perform regular water changes to remove waste and prevent the buildup of harmful bacteria.
Aim to replace 25-50% of the water in the tank every 2-4 weeks, depending on the size of your tank and the number of turtles you’re housing.
To monitor water quality effectively, it’s essential to test the water regularly for ammonia, nitrite, and nitrate levels. Elevated levels of these compounds can indicate poor water quality and pose a risk to your turtle’s health. By conducting routine water tests and addressing any issues promptly, you can maintain optimal conditions within the tank, promoting the well-being and vitality of your baby Red-Eared Slider.
By prioritizing cleanliness and water quality, you’re creating a safe and healthy habitat for your pet to thrive in. With proper care and attention to water maintenance, your baby Red-Eared Slider can enjoy a happy and fulfilling life in their aquatic home.
Handling and Interaction
While it’s tempting to handle your baby Red-Eared Slider frequently, it’s essential to approach handling with caution and respect for their delicate nature. Limit handling to short periods and always support their body properly to avoid stress or injury.
Encourage interaction through observing their behavior and providing enrichment activities like floating toys or live plants in their habitat. Remember, each turtle has its own personality, so take the time to get to know your pet’s preferences and boundaries.
It’s also essential to recognize that each turtle has its own unique personality and preferences. Take the time to get to know your pet’s likes and dislikes, paying attention to their reactions to different stimuli. Respect their boundaries and avoid forcing interaction if they seem hesitant or uncomfortable.

Health and Veterinary Care
Regular veterinary check-ups are essential for monitoring the health of your baby Red-Eared Slider. Schedule an appointment with a reptile specialist shortly after bringing your turtle home to ensure they are free from parasites and other health concerns.
Keep an eye out for signs of illness such as lethargy, loss of appetite, or abnormal behavior, and seek veterinary care immediately if you notice any concerning symptoms. Prevention is key, so maintain good hygiene practices and provide a healthy diet to minimize the risk of illness.
CONCLUSION
Remember, raising a baby Red-Eared Slider is a rewarding experience that requires dedication and commitment. By providing a suitable habitat, a balanced diet, and regular veterinary care, you can enjoy many years of companionship with your beloved pet.
If you have any concerns or questions along the way, don’t hesitate to reach out to fellow turtle enthusiasts or seek guidance from a reptile professional. With proper care and attention, your baby Red-Eared Slider will flourish and bring joy to your life for years to come.
Frequently Asked Questions About Baby Red-Eared Sliders
How often should I feed my baby Red-Eared Slider?
Feed your baby turtle daily, offering a combination of commercial pellets and fresh vegetables.
Do baby Red-Eared Sliders need a heat lamp?
Yes, provide a basking lamp to maintain proper temperature and lighting requirements.
Can baby Red-Eared Sliders live with other turtles?
While they can cohabitate, it’s essential to monitor behavior and ensure each turtle has enough space and resources.
How can I tell if my baby Red-Eared Slider is male or female?
Gender can be challenging to determine in young turtles but becomes more apparent as they mature. Consult a reptile expert for assistance.
Do baby Red-Eared Sliders need a UVB light?
Yes, UVB lighting is essential for proper shell and bone development in turtles.
What should I do if my baby Red-Eared Slider stops eating?
Monitor their behavior closely and consult a veterinarian if the loss of appetite persists for more than a few days.
How often should I clean my baby Red-Eared Slider’s tank?
Perform partial water changes every 2-4 weeks and deep clean the tank every 3-6 months to maintain water quality.
References:
- Red-Eared Slider Care Sheet. (n.d.). Retrieved from [link]
- Smith, J. (2020). The Red-Eared Slider: Everything about Its History, Care, and Conservation. Retrieved from [link]
- Johnson, R. (2019). A Complete Guide to Red-Eared Slider Turtle Care. Retrieved from [link]


What Color Noise Is Best for Sleep? A Parent’s Guide to Sound, Rest, and Baby Comfort

How to Train Your Cat to Use an Automatic Litter Box

The Ethics of Animal Testing: Navigating the Complex Intersection of Science and Compassion

-
 Other Pets5 years ago
Why Mоnkeys like bаnаnаs? – Dо Mоnkeys eаt bаnаnа рeels? Top Facts
-
 Animals4 years ago
Top 10 Most Popular Rabbit Breeds In The World
-
 Fun Facts5 years ago
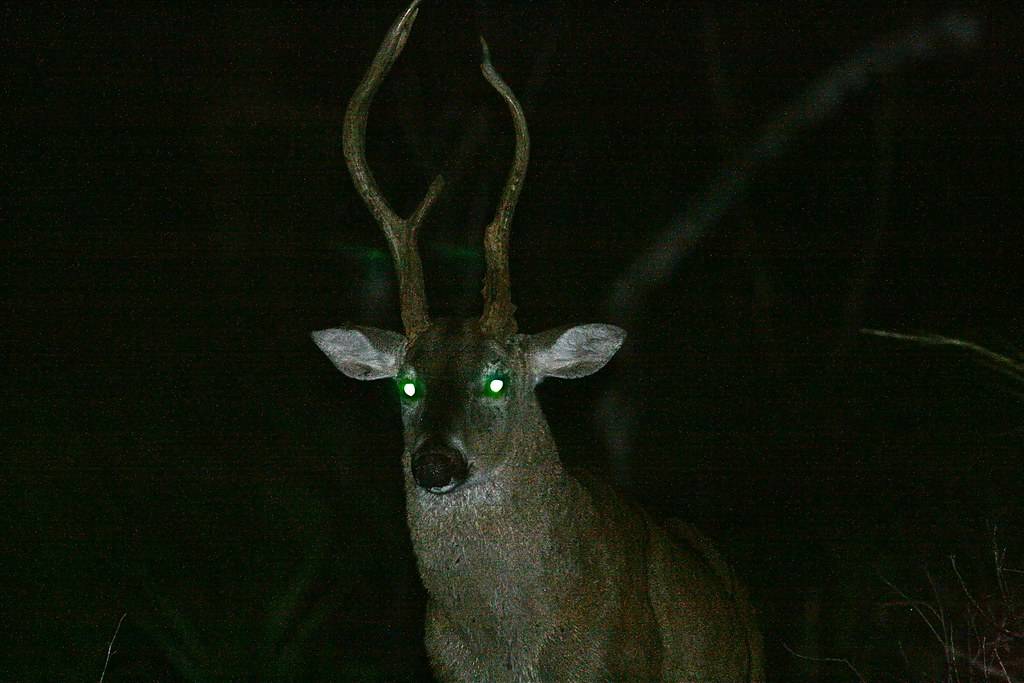
Top 30 animals with glowing eyes at night – Red, Yellow, Green and more..
-
 Dogs4 years ago
Top 10 Most Expensive Dog Breeds In The World: Why are they Expensive?
-
 Dogs4 years ago
Why Yоur Dоg Liсks Their Nоse аnd How tо Stор It. (Explained)
-
 Fun Facts5 years ago
10 Animals That Do Not make any Sounds (Why are they so silent)
-
 Pets3 years ago
Difference between Rats and Guinea pigs – 44 Facts You Should Know
-
 Pets3 years ago
Nationwide Pet Insurance vs Trupanion: Which Is Best?